Manually creating a P12 certificate
Manually creating a P12 certificate
Generate a P12 signing key from an Apple Enterprise account to supply to Fliplet’s Automated App Build system.
NOTE: You need a Mac to complete the following steps and generate a certificate.
- Log in on Apple Developer portal with your Enterprise account.
- Click on Certificates, Identifiers & Profiles from the left sidebar.
- Click on the plus icon on the top right to create a new certificate.
- Choose In-House and Ad Hoc from the Production section and continue.
- Following the steps from the interface, on your Mac open the Utilities folder from the application and launch Keychain Access.
- Within the Keychain Access drop down menu, select Keychain Access > Certificate Assistant > Request a Certificate from a Certificate Authority.
- In the Certificate Information window, enter the following information:
- In the User Email Address field, enter your email address.
- In the Common Name field, create a name for your private key (e.g., John Doe Dev Key).
- The CA Email Address field should be left empty.
- In the “Request is” group, select the “Saved to disk” option.
- Click Continue within Keychain Access to complete the CSR generating process.
- Back to the Apple website on your browser, click continue and then select the .certSigningRequest file saved on your Mac to upload it, then click continue.
- Your certificate will be ready for download. Download it on your Mac then click on it to install it on Keychain Access.
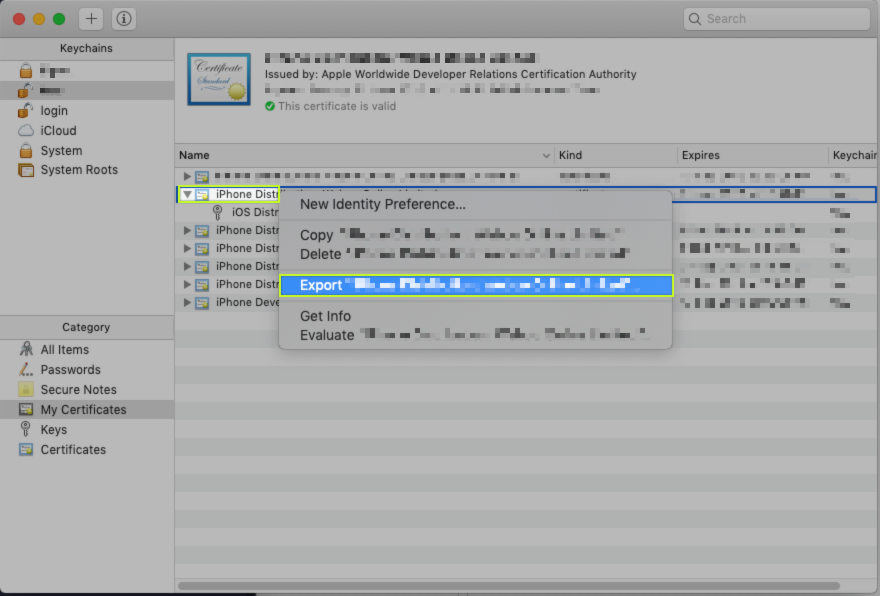
- Expand the imported certificate like the picture below to make sure it contains the private key, right click on the certificate and click export:
- When prompted to choose a password, leave it blank and continue.
- You then will be prompted to type in the password of your local user (the one on your Mac) to finish exporting the certificate.
- Select the destination where to export the p12 certificate.